Step 1: In Emburse Enterprise, select the + Create button in the Expenses ribbon to start a report.
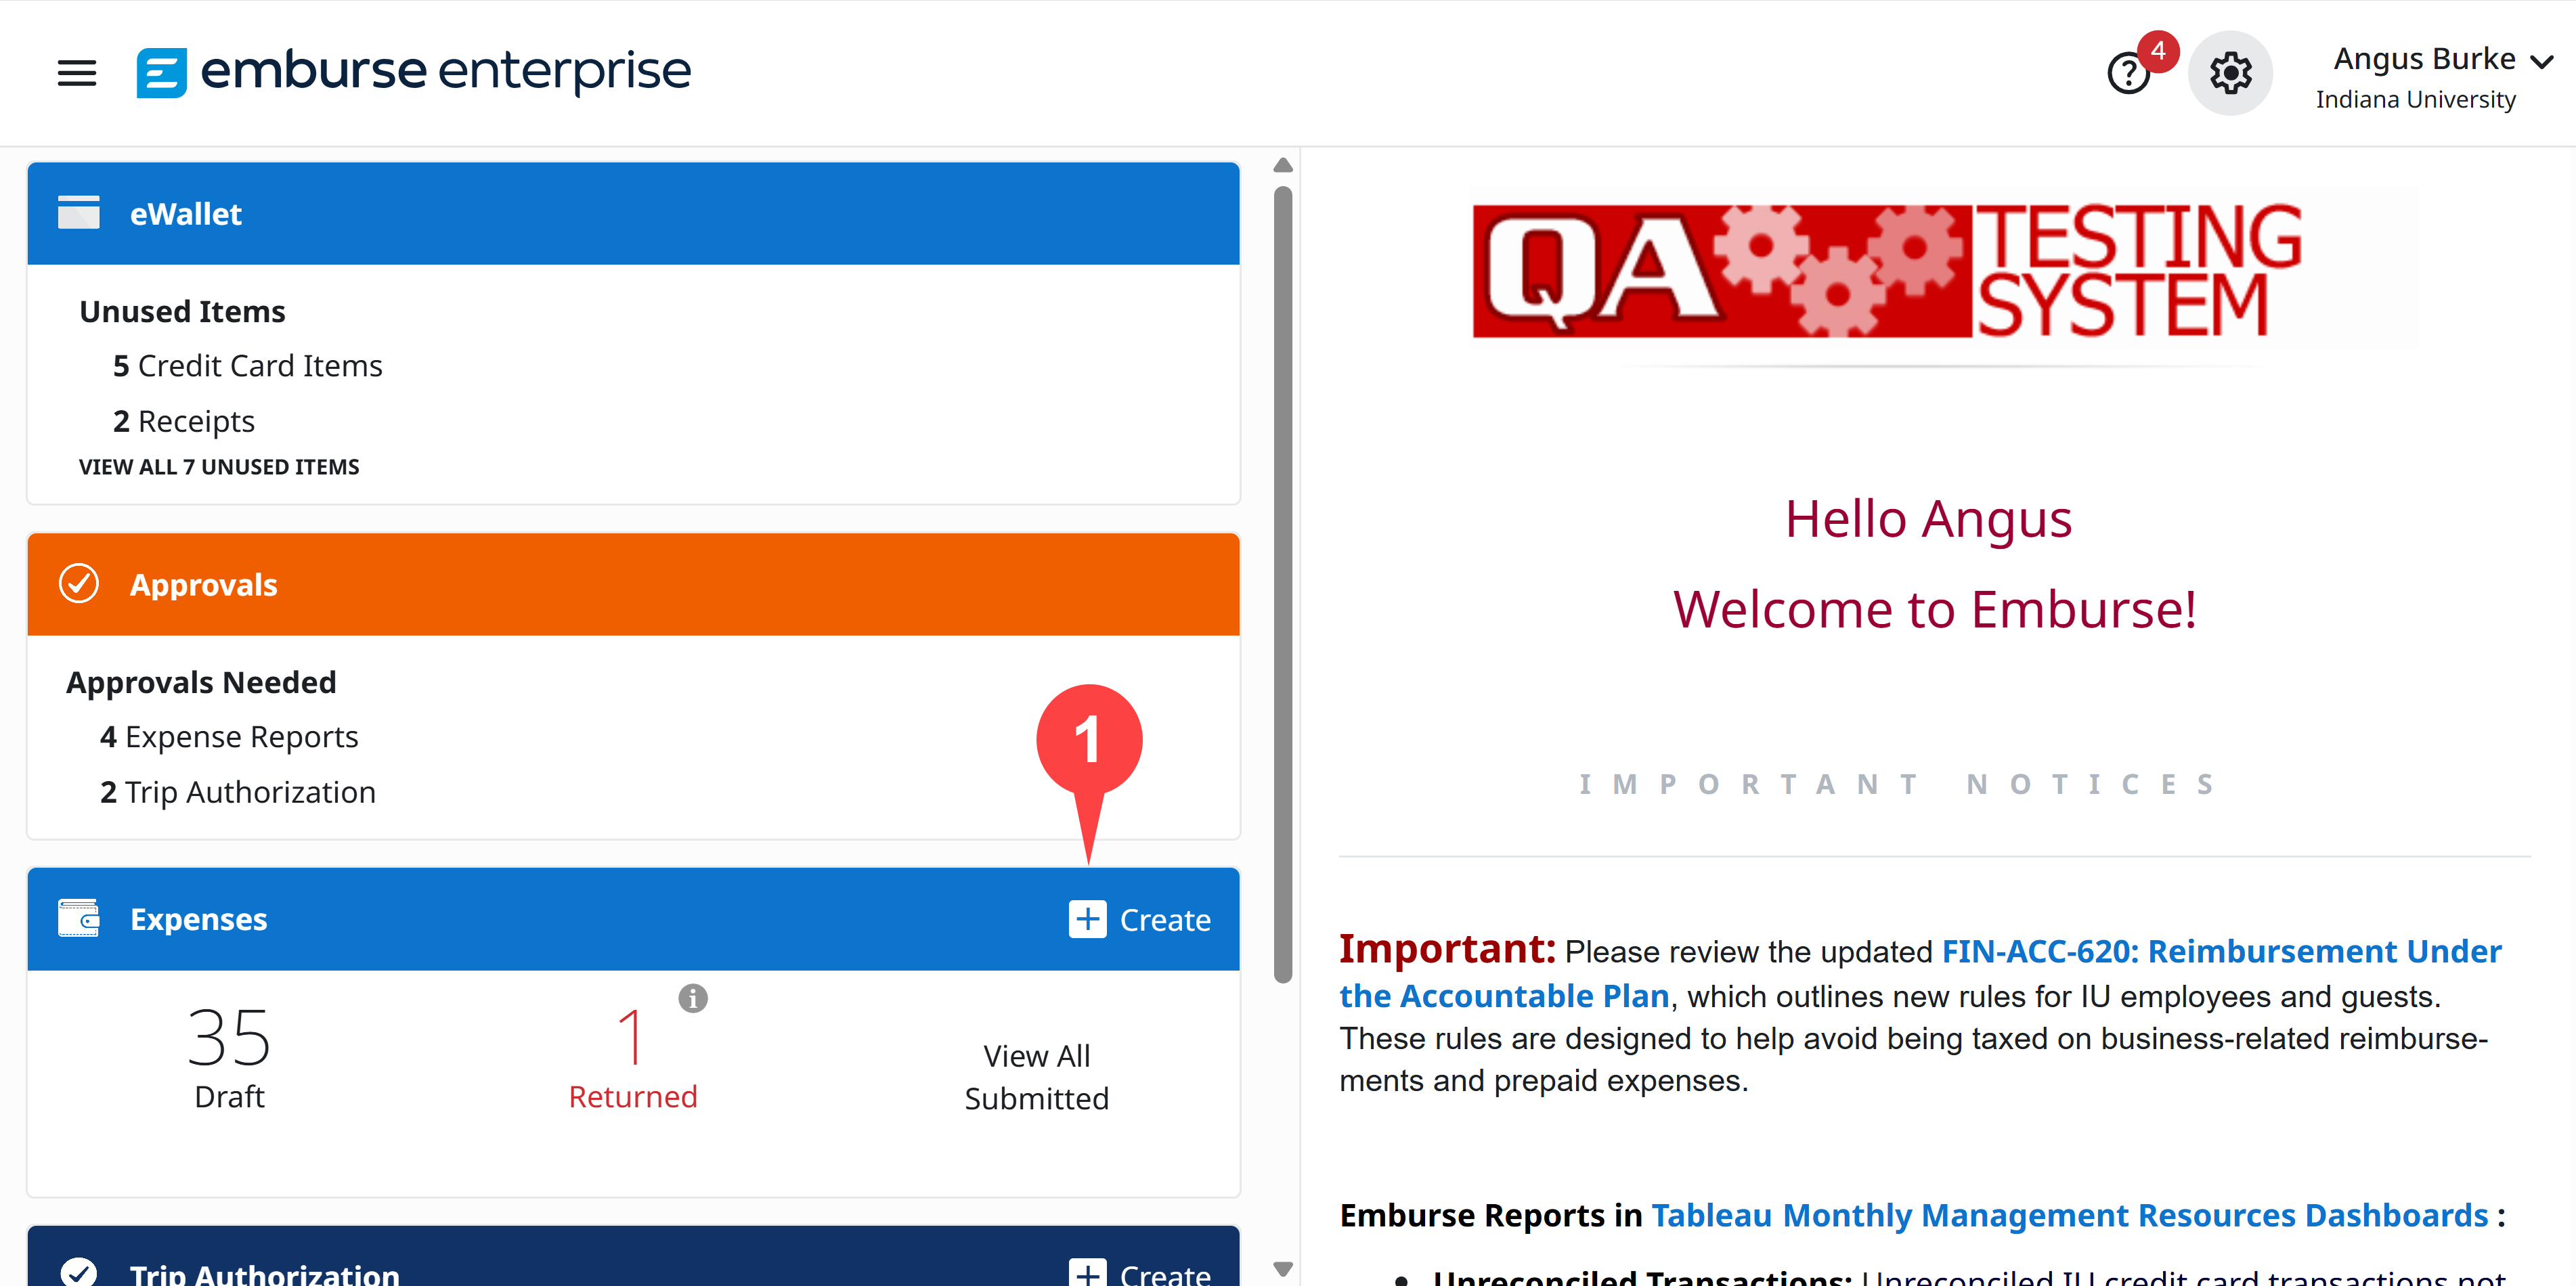
The Expense Report creation page opens.
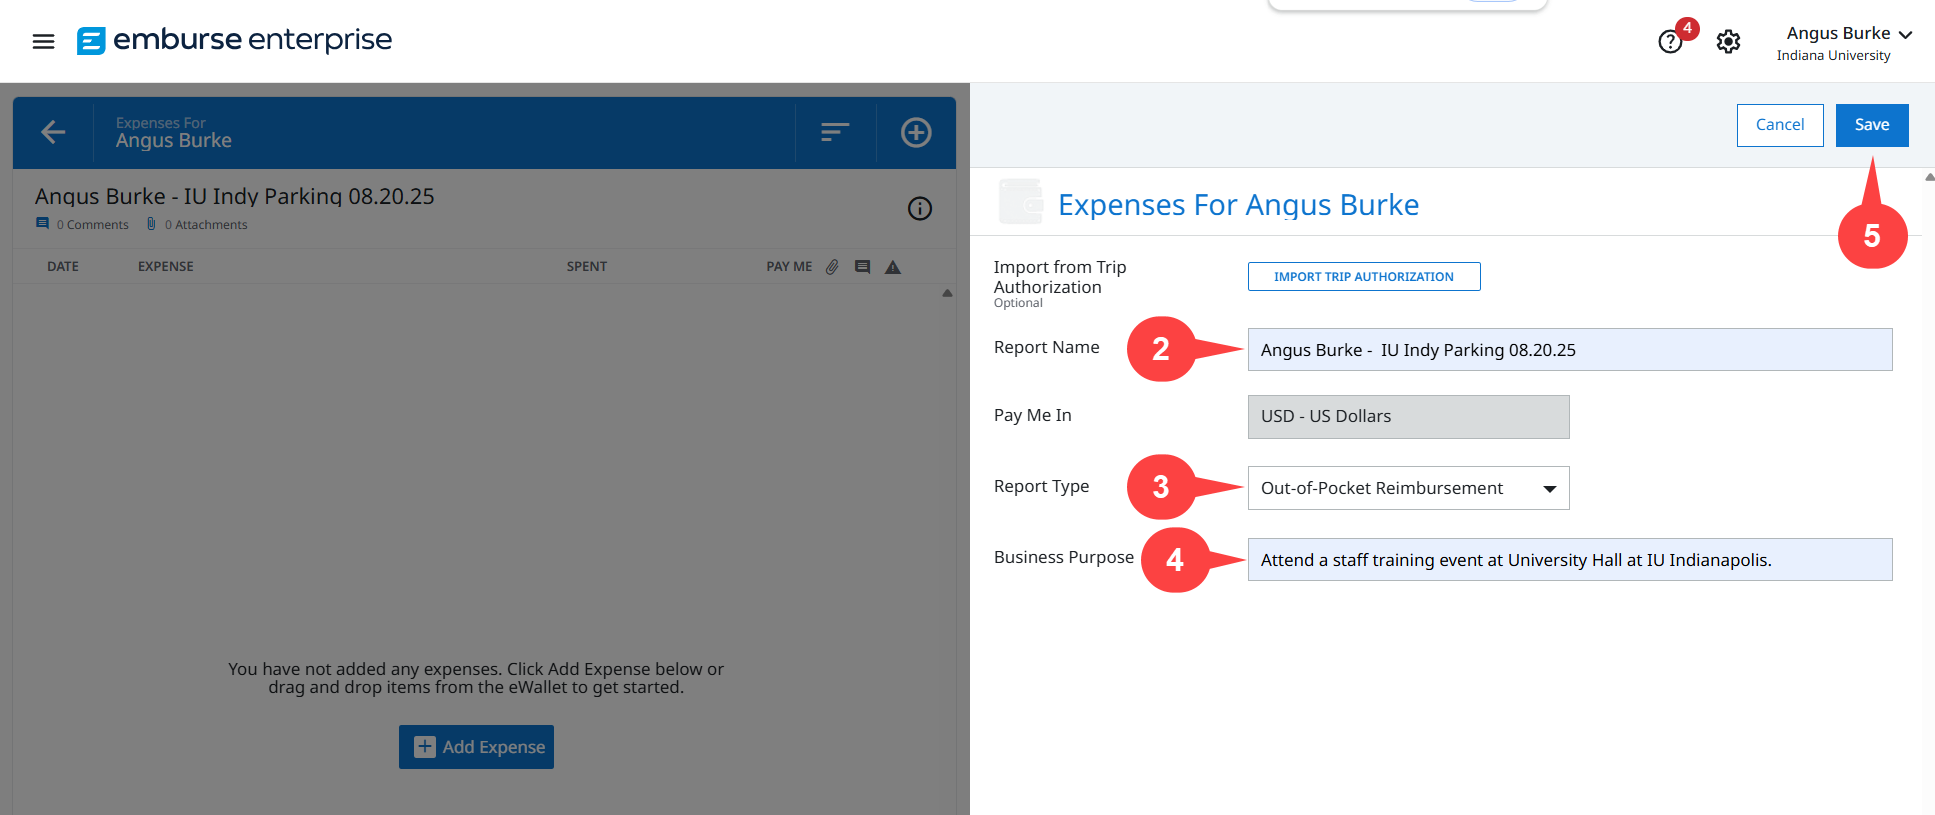
Step 2: Enter the name of your report in the Report Name field. Include the expense owner’s name and a description of what is being reimbursed.
Step 3: Select the Report Type drop-down menu and select Out-of-Pocket Reimbursement.
Step 4: In the Business Purpose field, enter an explanation for why the original purchase was made and can be reimbursed with IU funds. Avoid using acronyms in this field.
Step 5: Click Save to move to the next section of the report.
In our example we entered the report name “Angus Burke – IU Indy Parking 08.20.25” and selected Out-of-Pocket Reimbursement for the Report Type. In the Business Purpose field, we explained that we traveled to IU Indianapolis for a training event.
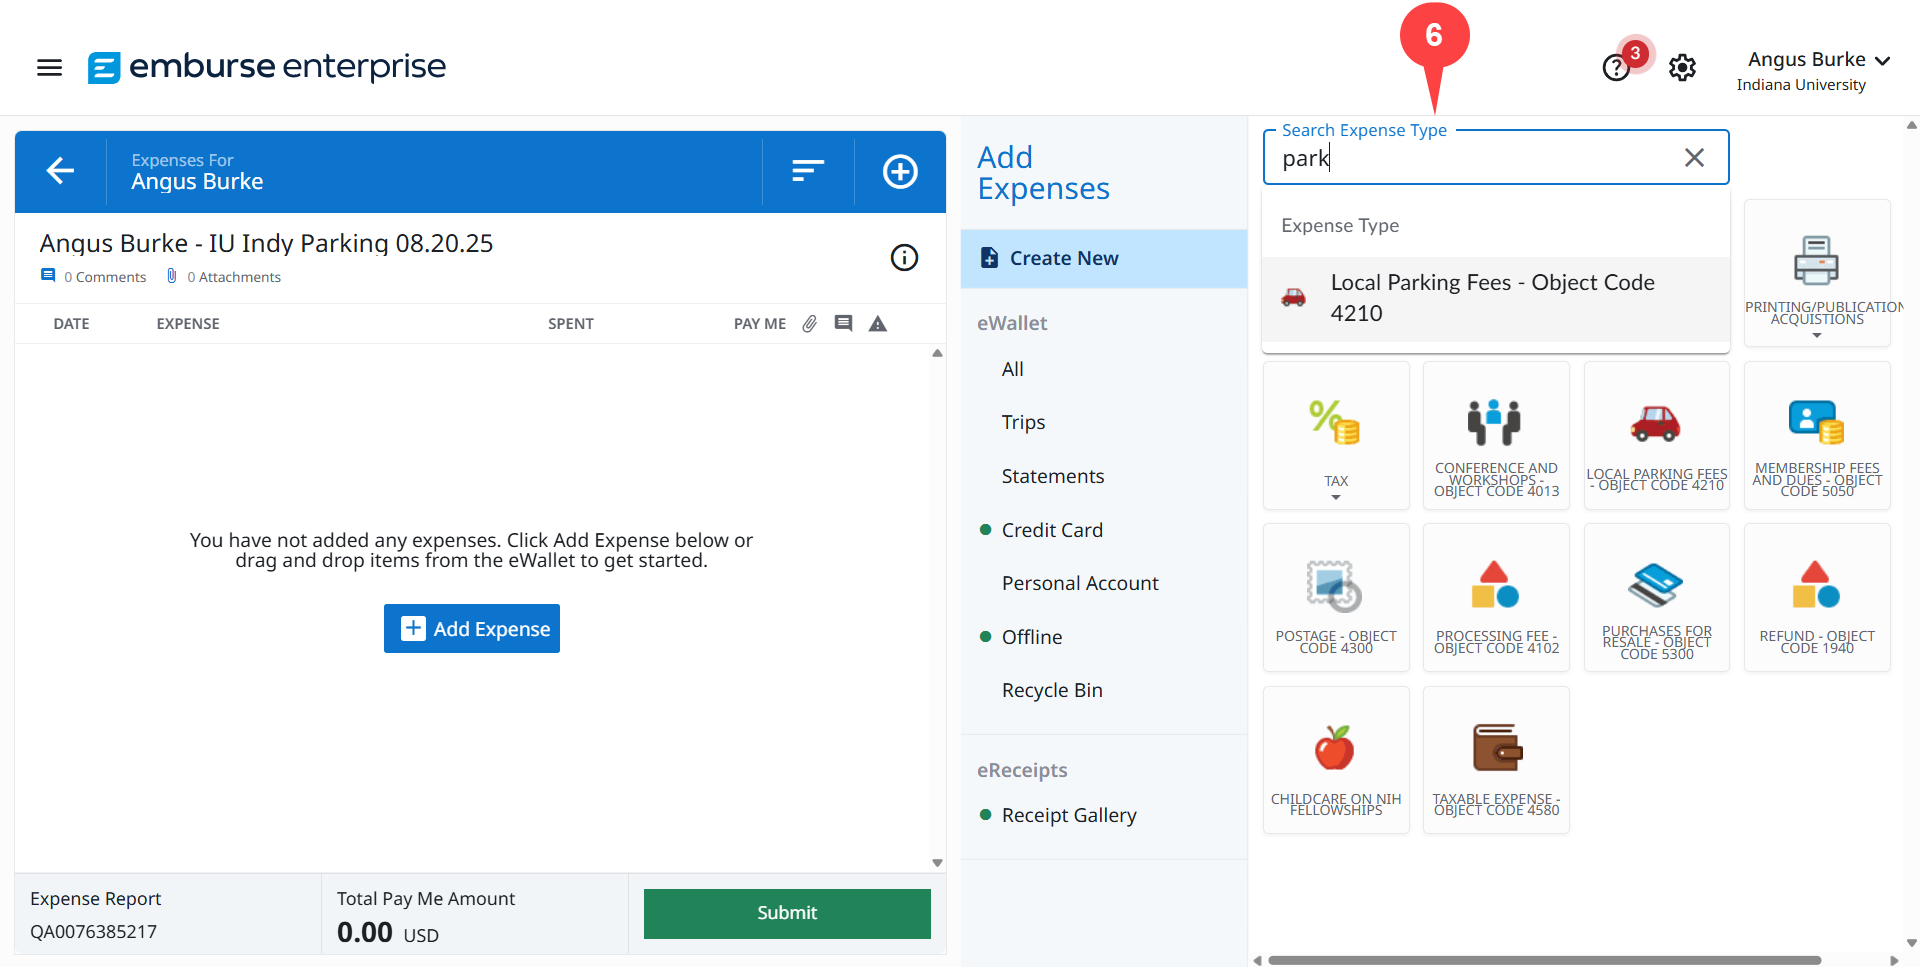
The Expense Report page opens. The next steps are completed in the Add Expenses pane on the right side of the screen.
Step 6: Enter keywords or an object code number in the Search Expense Type field to search for an expense type that describes the expense being reimbursed. Select the Expense Type from the drop-down list that best describes the expense.
In our example, we entered “park” in the Search Expense Type field because Angus parked in a city parking garage for his training event. The Local Parking Fees – Object Code 4210 expense type best describes this type of parking, and we selected it.
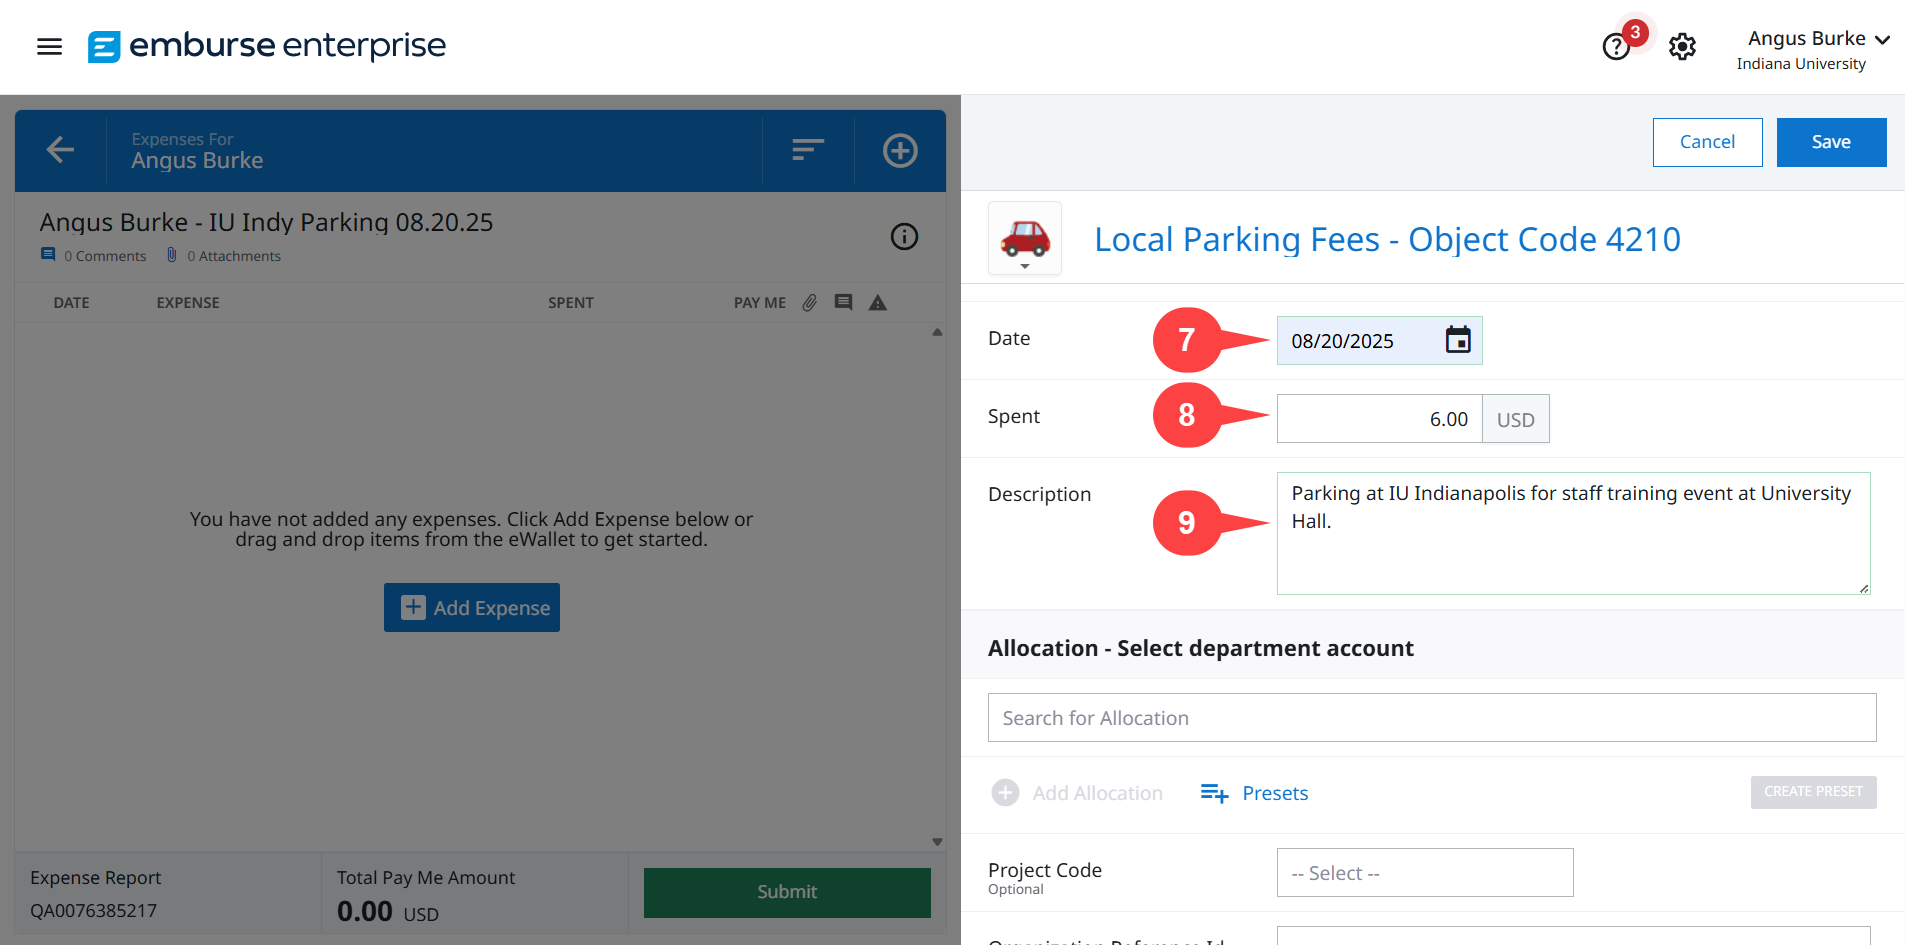
The page updates with the Expense pane. Complete the following fields:
Step 7: Enter the date of purchase from the receipt in the Date field.
Step 8: In the Spent field, enter the total amount spent from the receipt. This is the amount that should be reimbursed.
A note on sales tax: Your department may or may not reimburse sales tax. Ask your Fiscal Officer (FO) if you can be reimbursed for the sales tax you paid. If it is not reimbursable, reduce the amount in the Spent field by the amount of sales tax you paid.
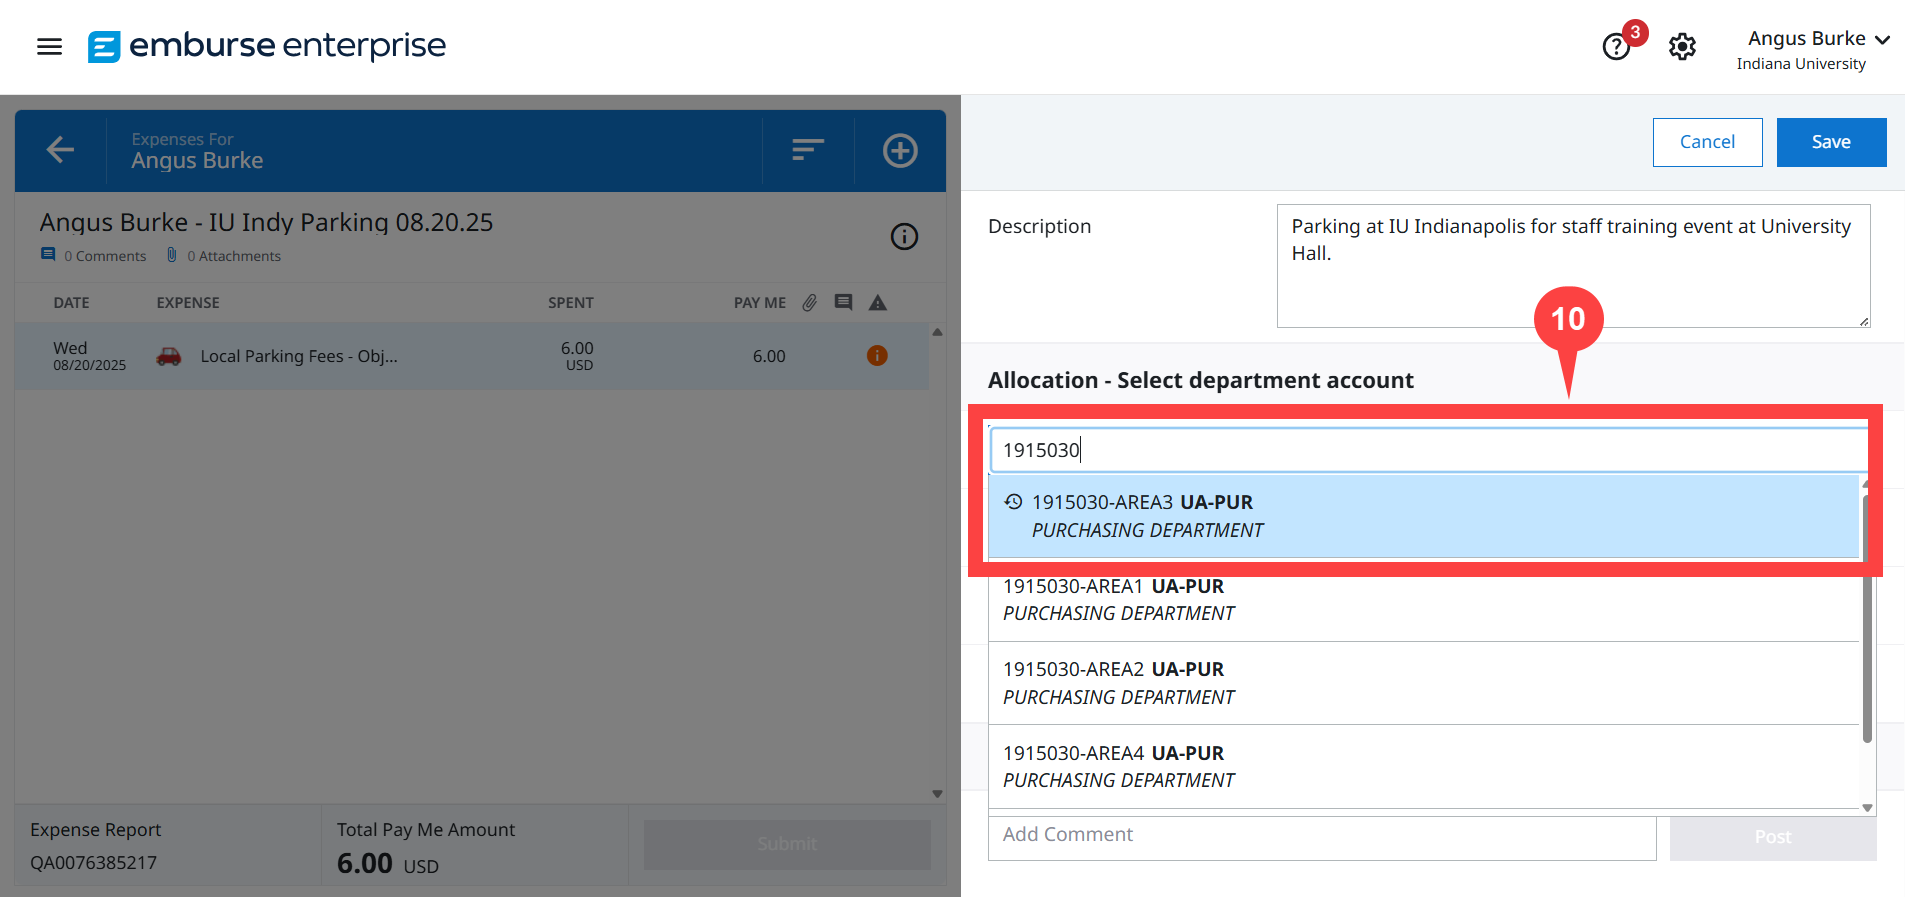
Step 9: In the Description field, enter details that explain why this purchase was made and why it supported IU business. Helpful details include a description of the items purchased or the event where the purchase was made.
In this example, we entered August 20, the date the parking charge was incurred, in the Date field. In the Spent field, we entered $6, the amount spent on parking. Finally, we entered, “Parking at IU Indianapolis for staff training event at University Hall,” in the Description field to explain where we parked and why.
Scroll down in the Expense pane and complete the Allocation section fields. These fields determine the account that will fund the reimbursement.
Step 10: Enter the KFS account number in the Allocation – Select department account field to search for it. Sub-accounts are displayed first. Select the account you need to use from the list.
In our example, we entered our department account, “1915030,” in the Allocation field, then selected “1915030-AREA3” from the list of options.
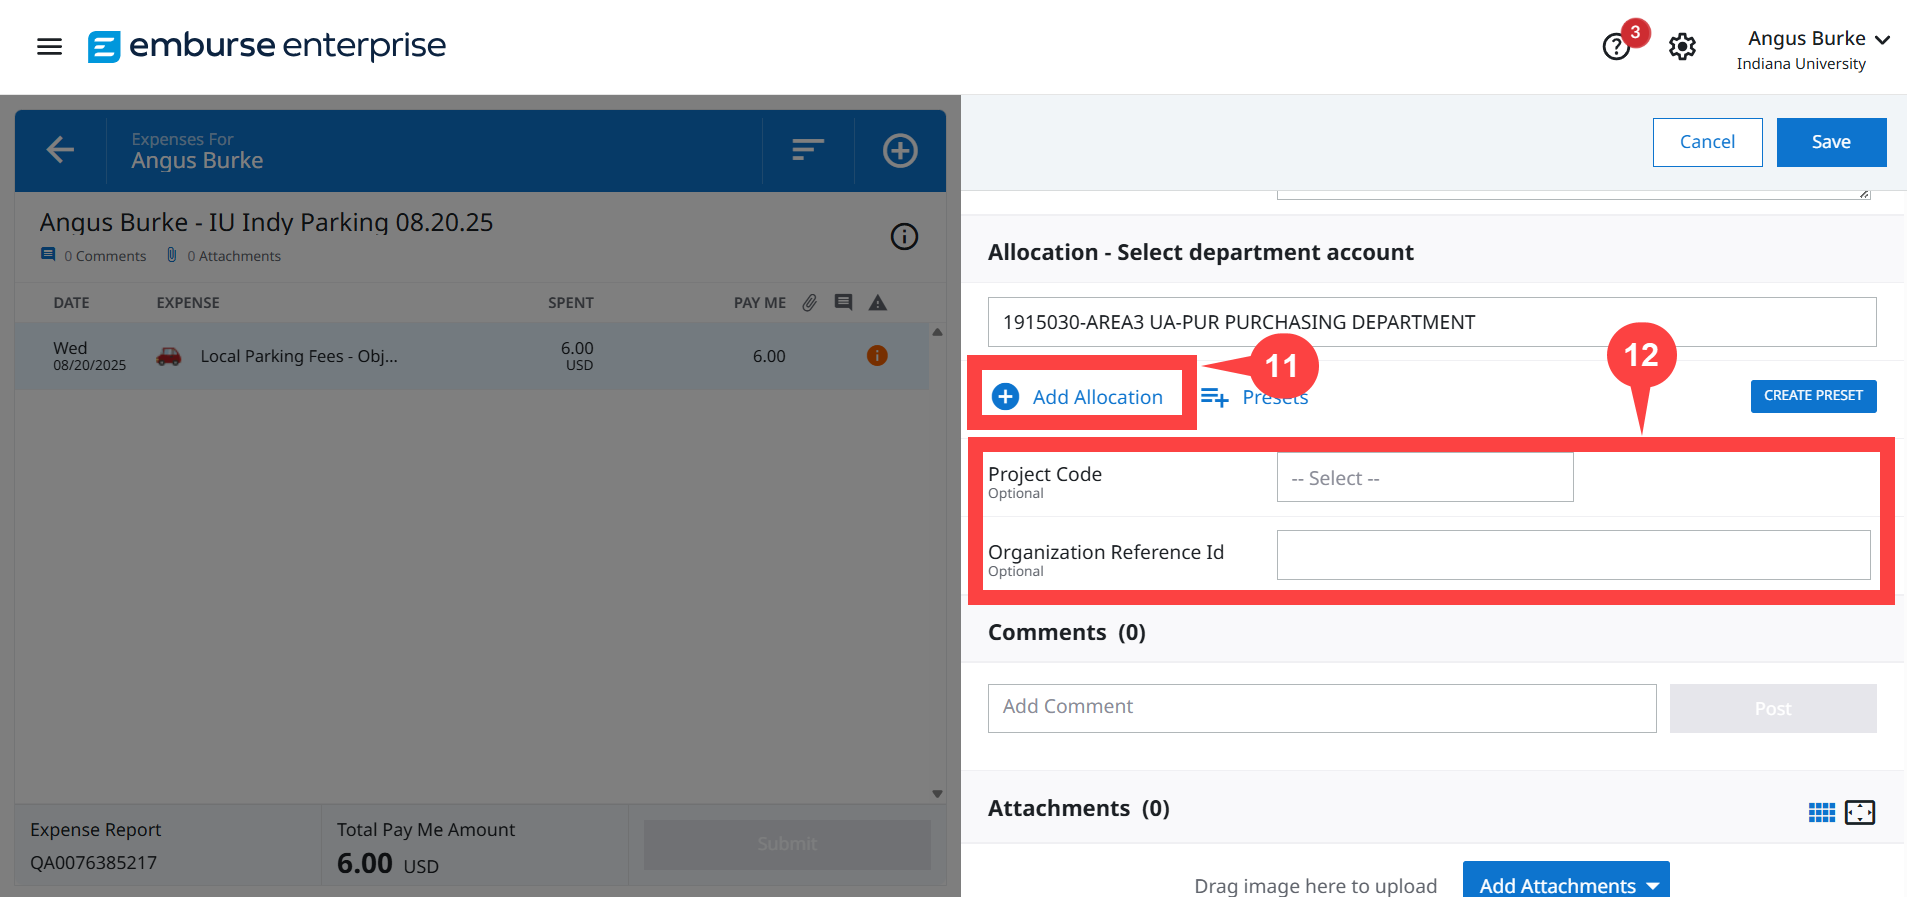
The following steps are optional but may be required depending on your department.
Step 11: Select the + Add Allocation option if you need to split the reimbursement over multiple accounts. Watch the Splitting Allocations video to learn how.
Step 12: The Project Code and Organization Reference ID fields may be used by your department to help categorize transactions. Consult with your Fiscal Officer (FO) to learn if your organization uses these fields.
We didn’t need to split the expense over multiple accounts and our department doesn’t use the Project Code or Organization Reference ID fields so we left them blank.
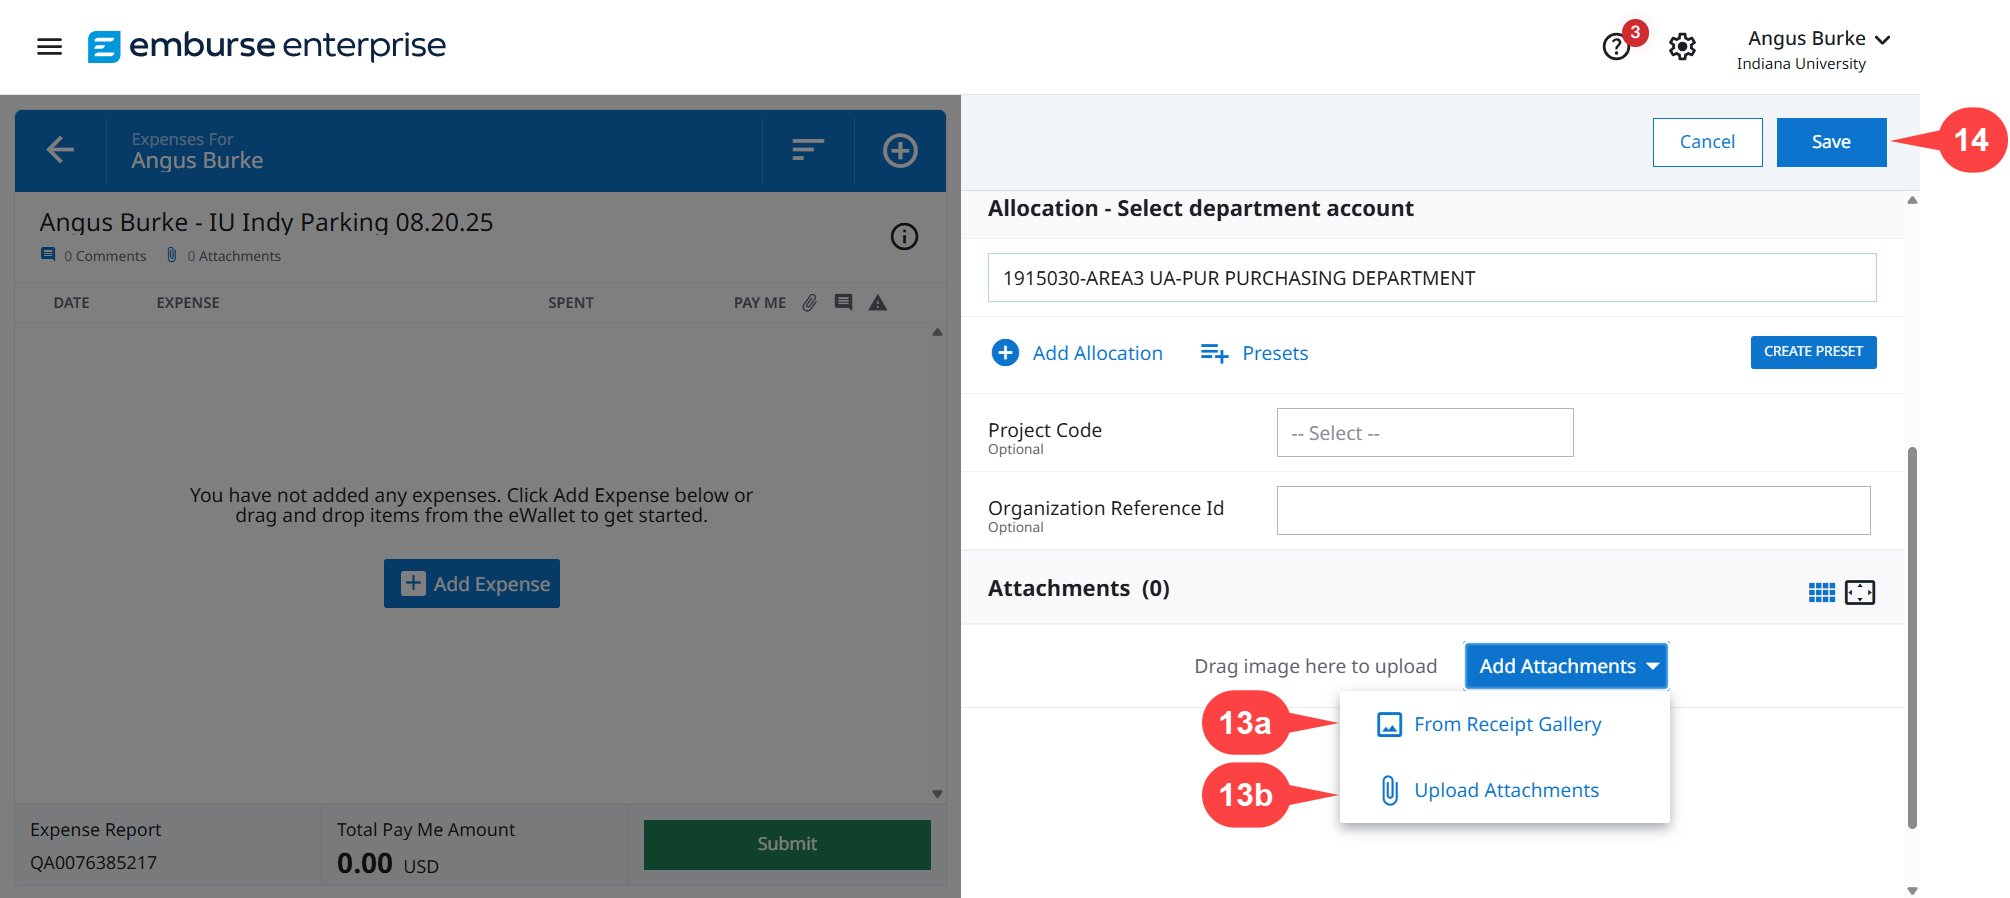
Scroll down the Expense pane to the Attachments section. Here, we’ll attach the receipt that verifies the details of this expense. Additional documentation can be added if it helps provide context for the purchase and explain why it was made.
Step 13: Select the Add Attachments button to add a receipt. There are two ways to add a receipt to the expense:
- Select From Receipt Gallery if you used the Emburse app on your mobile device to take a picture of the receipt that was added to your Emburse Receipt Gallery.
- Use the Upload Attachments option to search for the receipt on your computer or other device.
Step 14: Click Save to add the expense to your report.
The expense is added to the Expense List pane on the left side. Click the + (Circled Plus) button to add another out-of-pocket expense to the report. Repeat steps 6-14 for each additional expense.
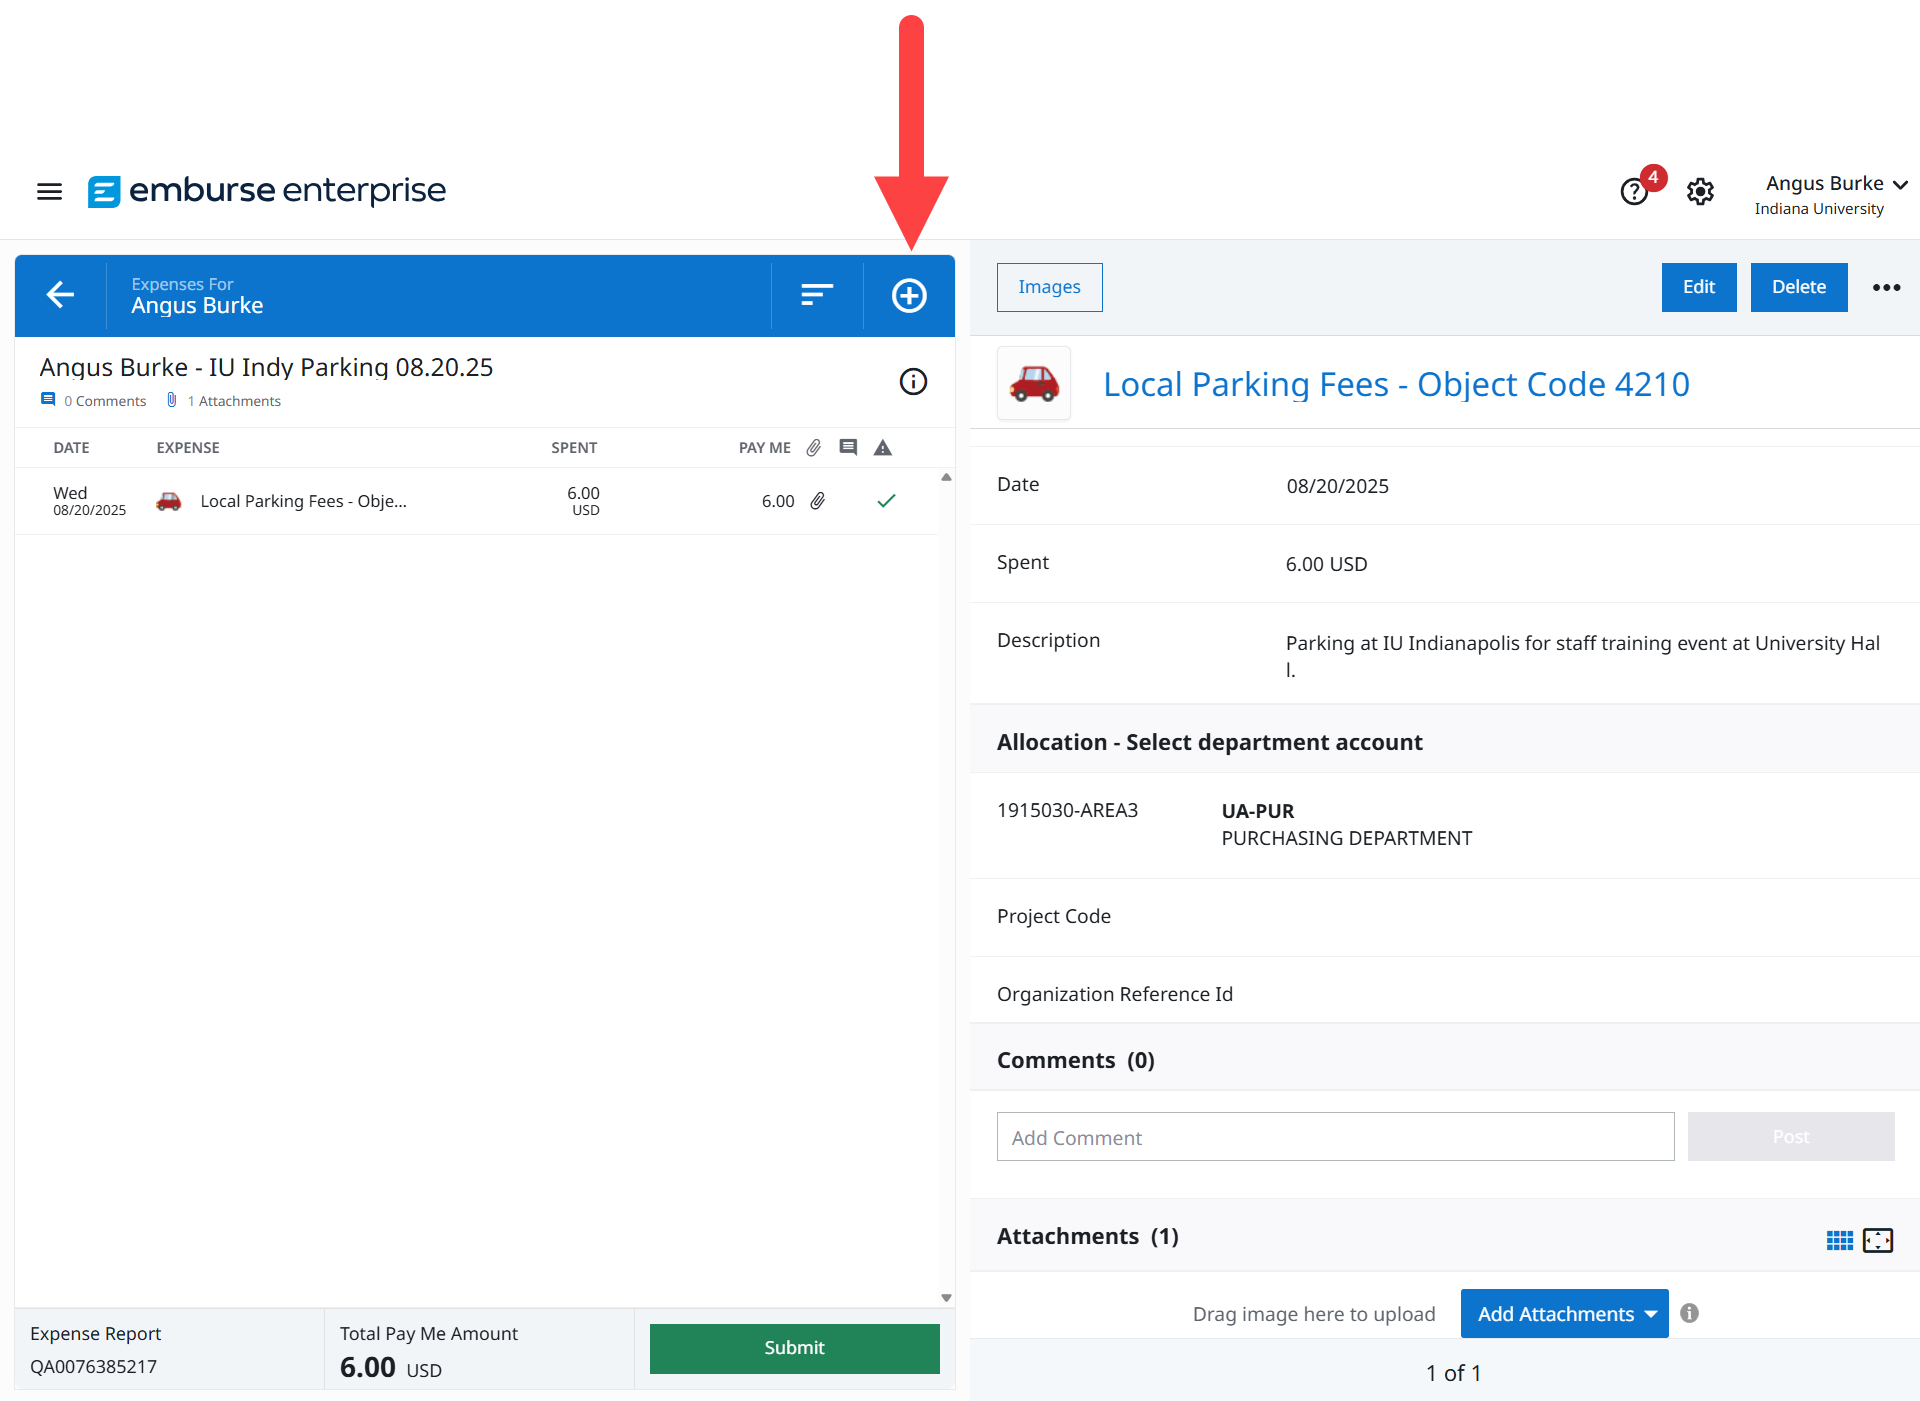
After all expense are added, review the following and submit the report:
Step 15: Confirm there is a green checkmark in the Warning (⚠) column. If there is an orange warning symbol information is missing on the expense.
Step 16: After selecting an expense line, click the Edit button to edit or add information to an expense and clear orange warnings.
Step 17: Review the Total Pay Me Amount. The is the value of the reimbursement that will be issued. Edit expenses if this total is incorrect.
Step 18: After reviewing your work, click the Submit button to submit the report.

Step 19: Review the report summary, then click Submit again to submit the report for review.

The report routes to approvers for the accounts you used on the report. Watch the Report Approval and Tracking video to learn how to track a report.

