This page demonstrates duplicating a Trip Authorization (TA), switching to the recipient’s Emburse Enterprise profile, and updating header fields. Emburse Enterprise users can duplicate a TA and optionally send the copy to another user. This is useful when:
- Arranging travel for multiple staff attending the same conference
- Trip authorization was mistakenly submitted under the wrong profile
- A traveler is completing a series of similar trips that each require trip authorization
View a Video Walkthrough
If you are a Delegate, switch profiles to the expense owner whose profile contains the TA to be duplicated.
Locate the TA you want to duplicate in the Submitted section of your Trip Authorization ribbon.

A list of your submitted TA’s displays on the left. Select the row containing the TA to duplicate and click Duplicate in the right pane.
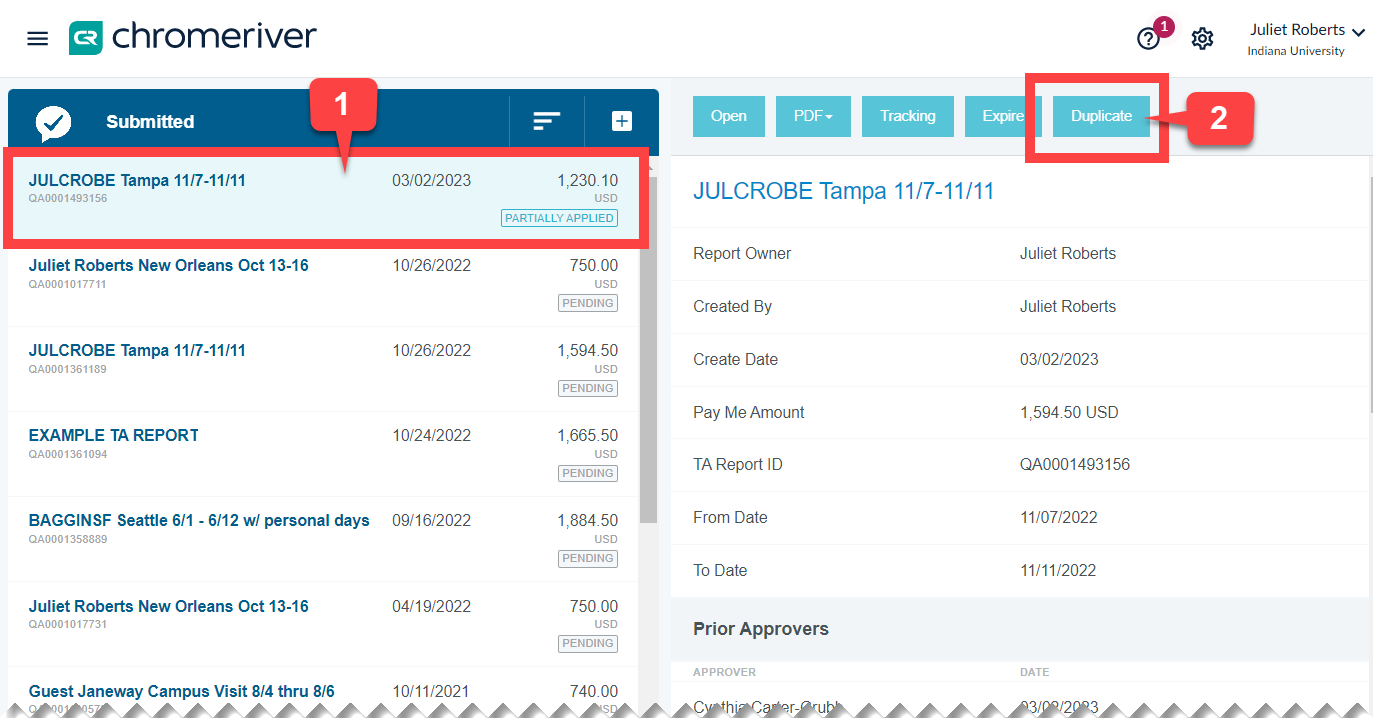
Note: If you don’t see the Duplicate button, click on the 3-dot menu in the upper right corner.
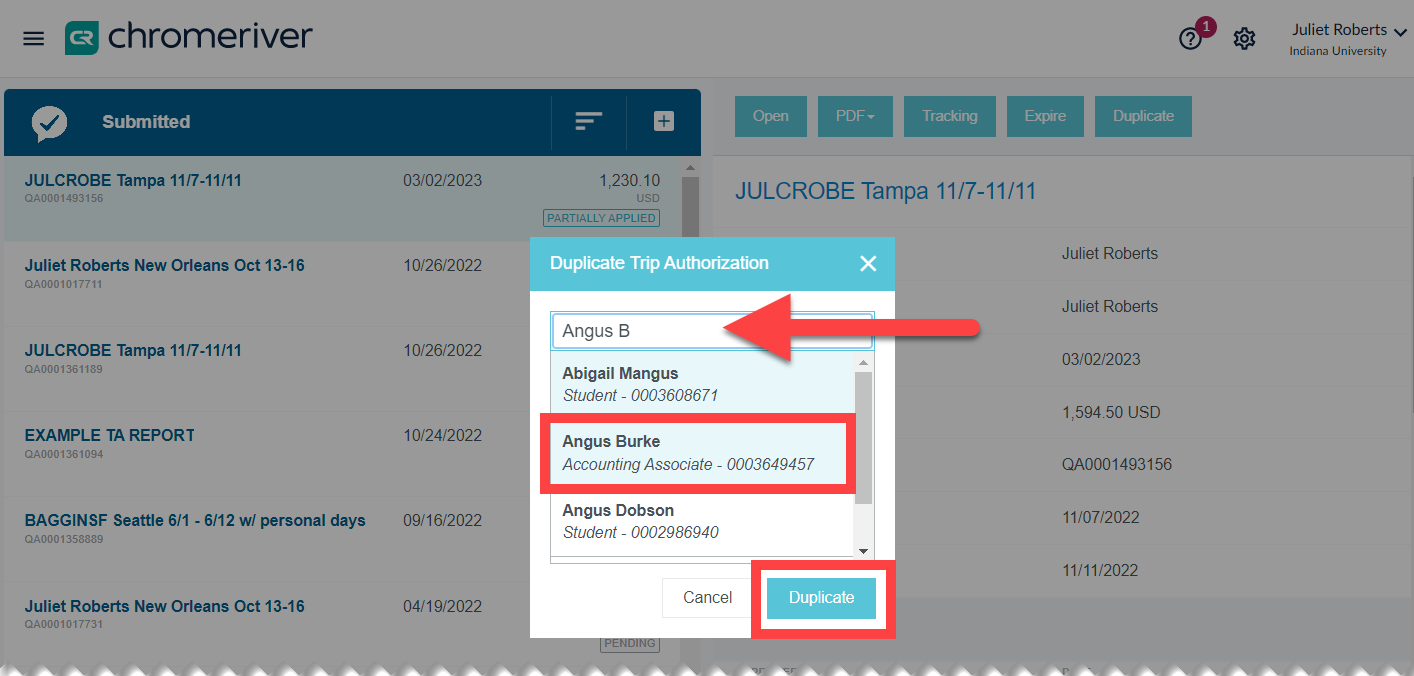
A search box containing people in your organization appears. Enter the name of the user who will use the duplicated TA in the search box. To duplicate the TA to the same profile it was created on, type the name of that user. When the correct recipient is located, select their name and click Duplicate.
In this example, we’re copying a TA from Juliet Roberts to Angus Burke.
A pop-up confirms your TA was duplicated to the specified expense owner.
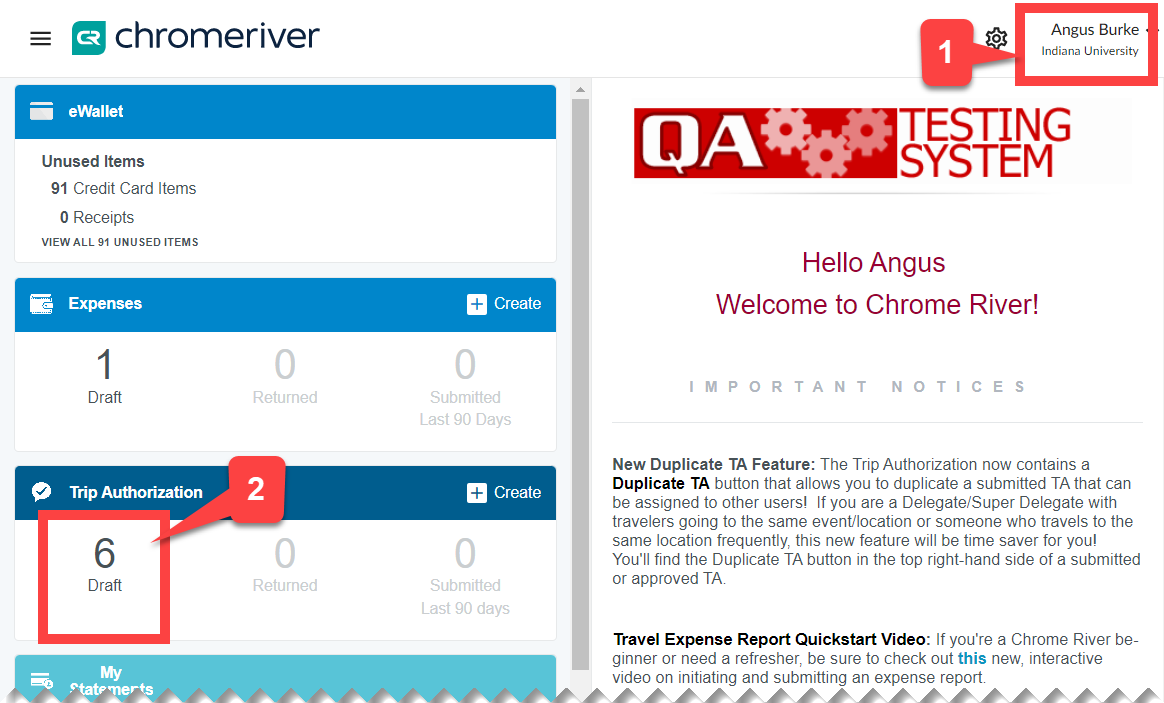
If you are a Delegate, switch profiles to the expense owner whose profile contains the new TA copy. Click the Drafts section of the Trip Authorization ribbon to find the duplicated TA.
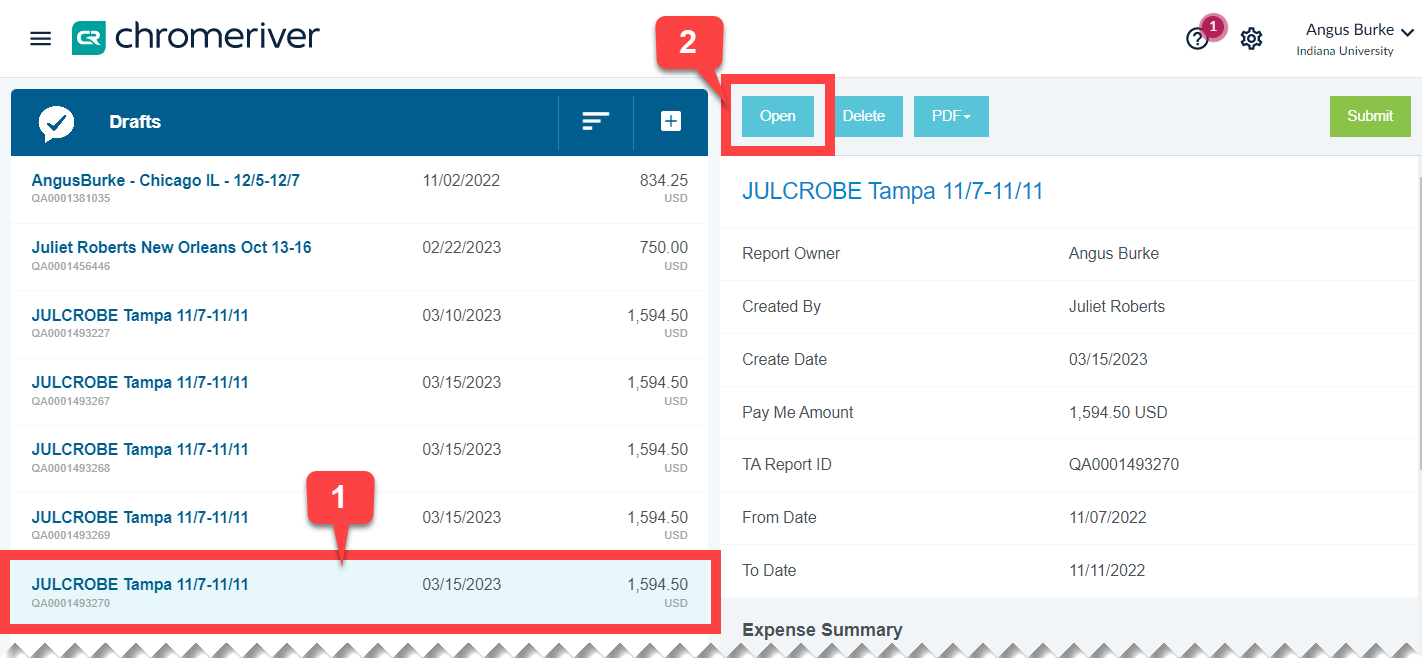
A list of draft TA’s displays on the left. Select the row containing the TA to edit and click Open.
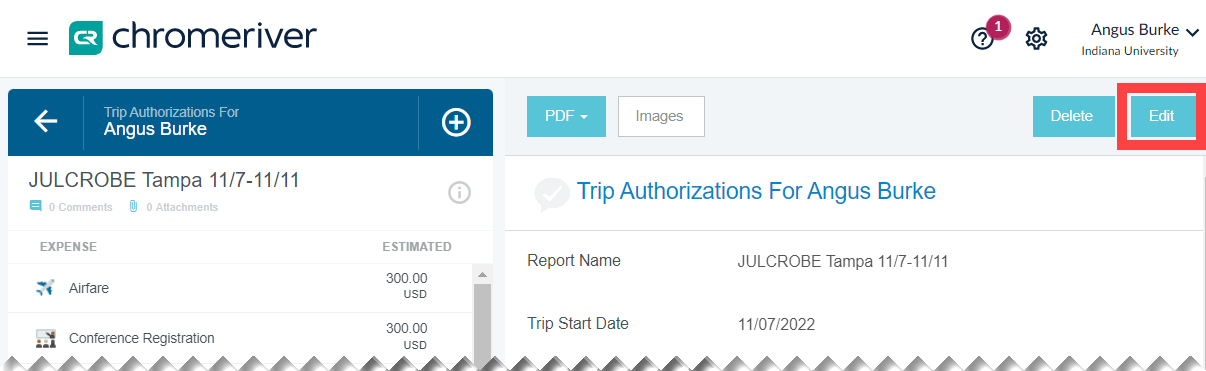
Click Edit in the upper right corner.
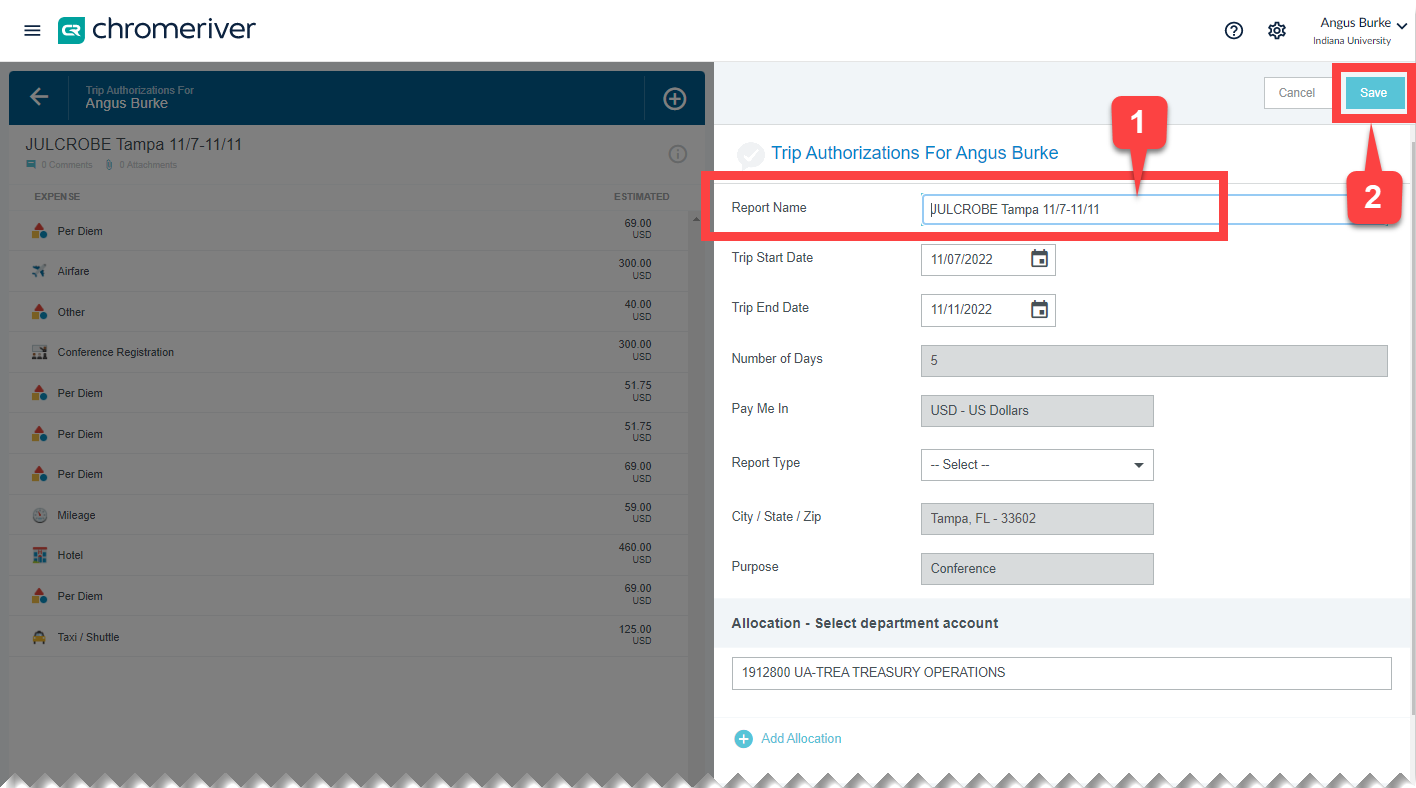
Update the Report Name to reflect the new expense owner and click Save.
Note: The Allocation field refers to the account number funding the trip. The account used in this screenshot is an example. Ask your Fiscal Officer what account to use.
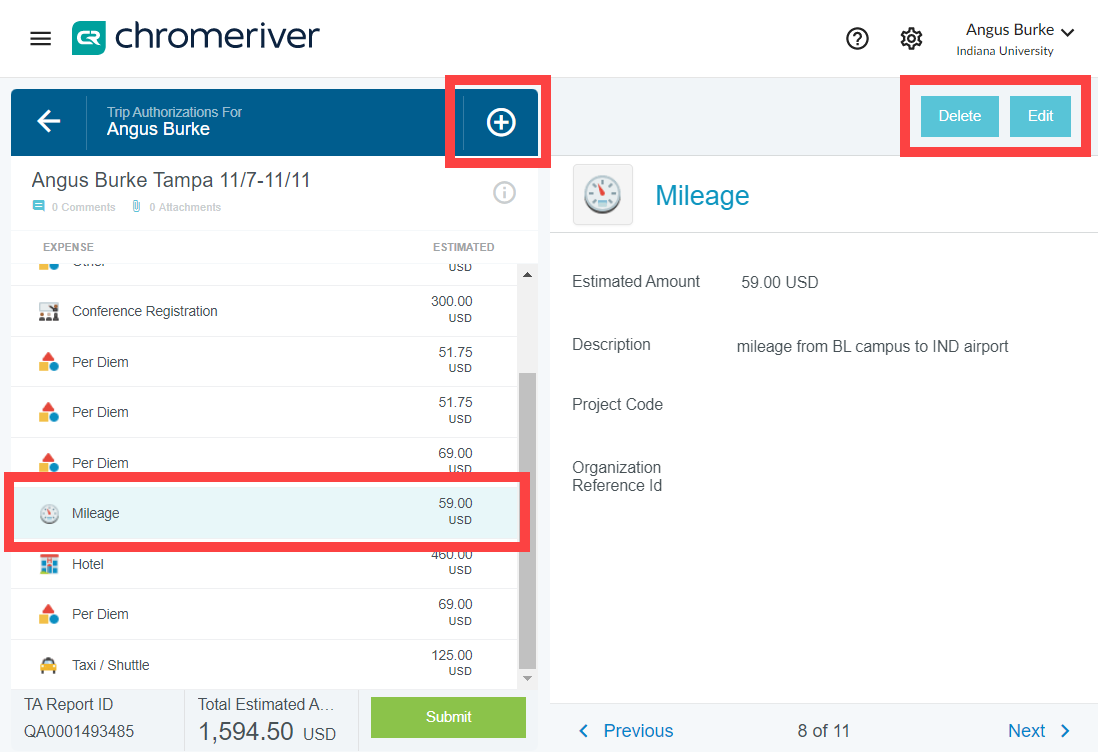
Finally, review and adjust any of the expense lines as needed.
Select an expense in the left pane, then click Delete or Edit in the right pane to take that action. Add new expenses by clicking the encircled plus sign in the top middle of the report.