Navigate to System 1. Before you can begin configuring assets, you must know if each line item is an individual asset or if it is to be combined with other line items to make a system asset. In the example above, we are told by the requestor:
- Spectrometer (Item 1) is an individual asset
- Gel Documentation Systems (Item 2) are two individual assets
- Flask clamps (Items 4 & 5) go with the Shaker Incubator (Item 3) to make a system asset
- Training (Item 6) is related to all items
According to the above information, there will be three systems with a total of four assets:
- System 1 Spectrometer - 1 asset
- System 2 Gel Documentation System - 2 assets
- System 3 Shaker Incubator - 1 asset
System 1 Spectrometer
- Select all items to be included in the system.
- Select Item 1 Spectrometer.
- Select Item 6 Training to include a portion of the training costs.
- Determine the amounts of each item to be included.
- In this example, the Spectrometer has a quantity of 1 so there is no need to change the drop-down or text box from the default.
- Training also has a quantity of 1, but this is to be distributed between the four assets. In order to select only 1/4 of this cost, choose Select by Percentage. Enter in 25% in the text box since only 1/4 of the cost is to be applied to the Spectrometer.
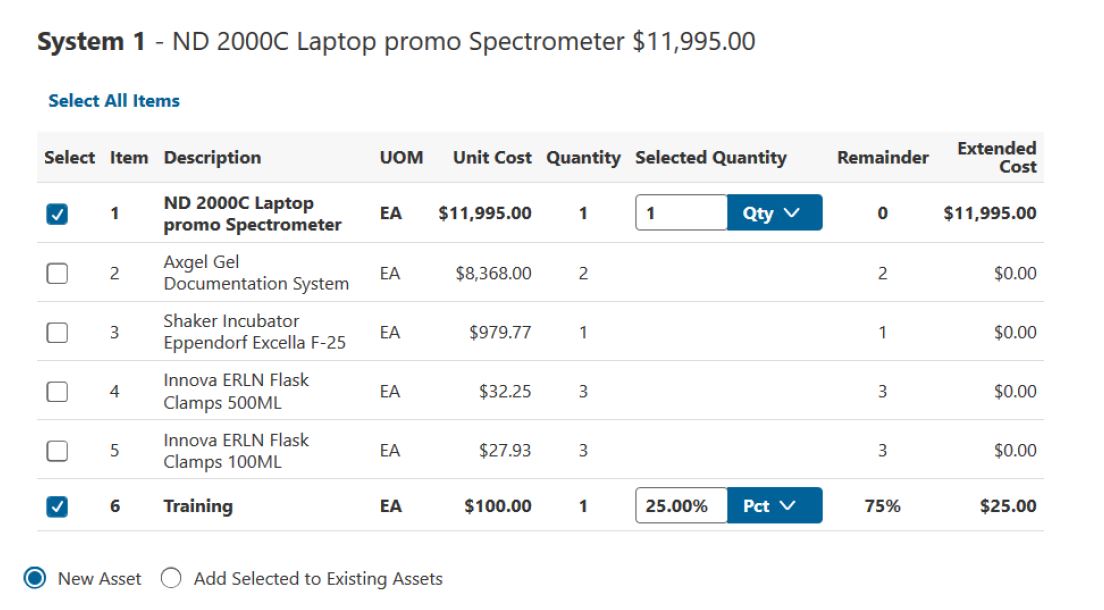
- Note how the remainder column adjusts to reflect the quantity, amount, or percentage remaining to be configured for that item.
- Since this example is purchasing new assets, leave as the default of New Asset.
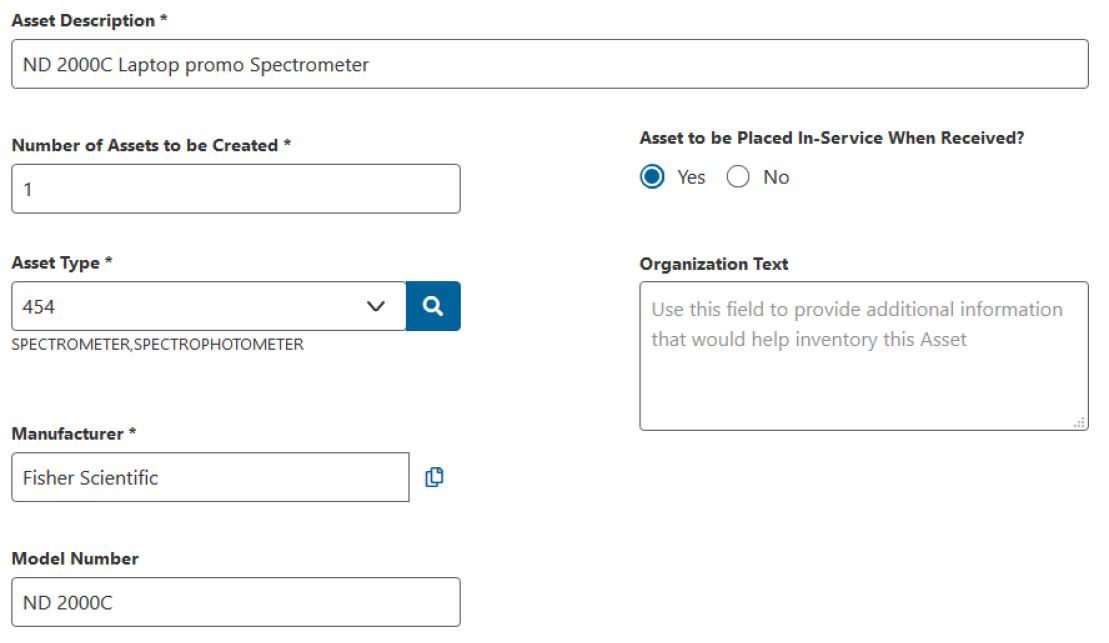
- Enter asset information for the spectrometer.
- Asset Description: Will automatically populate with the description of the first item selected and is appropriate for this asset so no editing is required.
- Number of Assets to be Created: Same as the defaulted value of 1.
- Asset to be Placed in Service Within 30 days of Receipt?: Click Yes.
- Asset Type: In this example, start typing "spectrometer" and a list of items with that description will display for selection. Select 454 from the list.
- Manufacturer: Type Fisher Scientific.
- Model Number: Type ND 2000C.
- Enter location information for the spectrometer.
- Click Configure Next System.
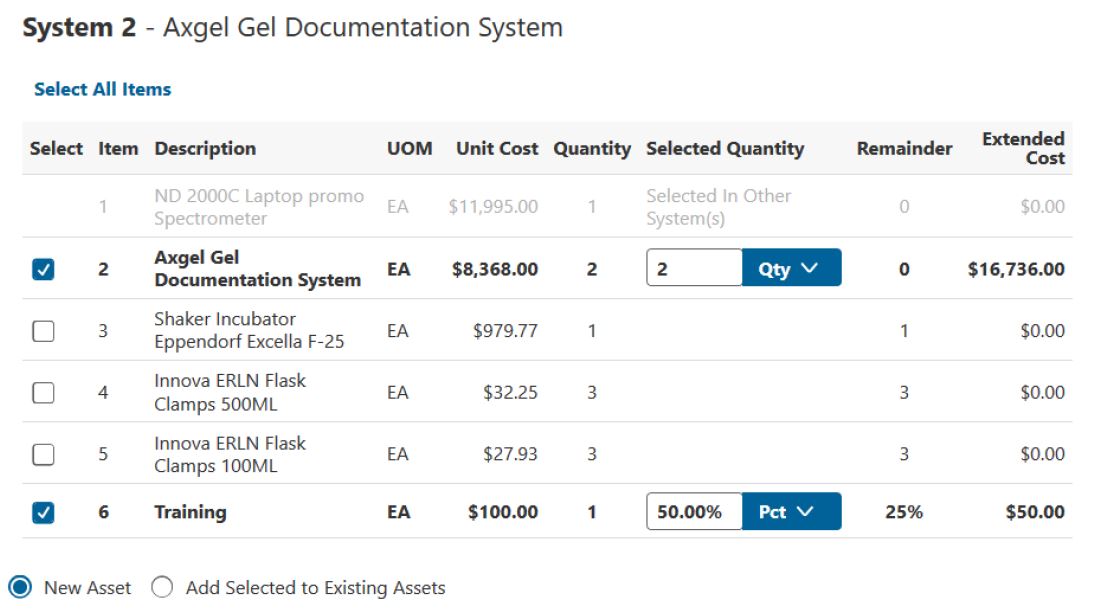
System 2 Gel Documentation System
- Select items to be included in the Gel Documentation System assets.
- Leave the defaulted choice of New Asset.
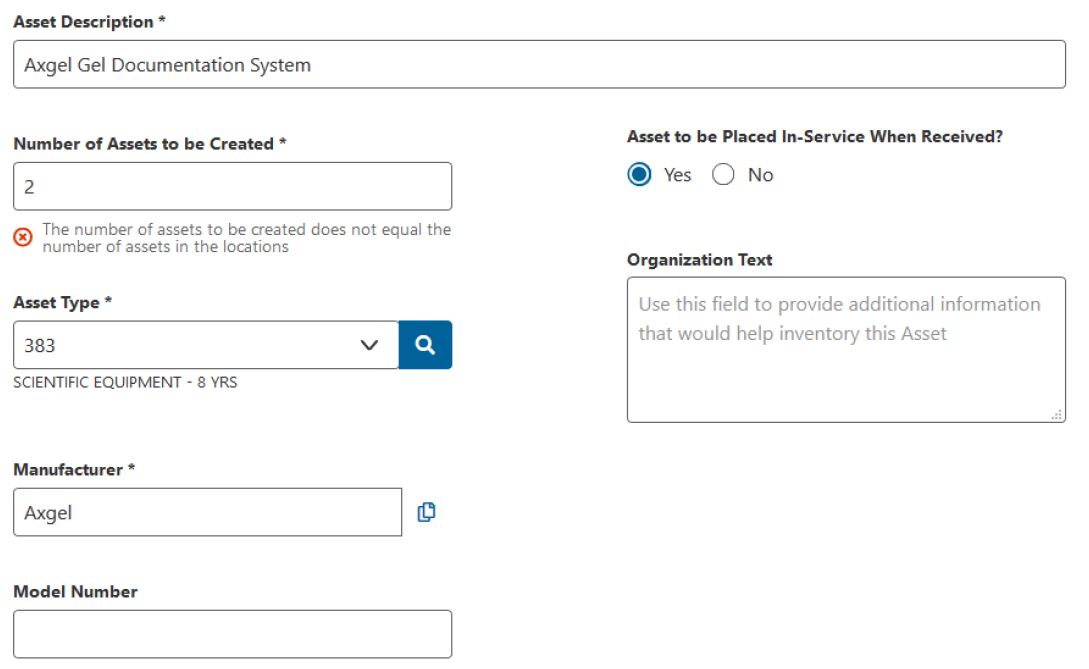
- Enter asset information for the Gel Documentation System.
- Enter location information for the Gel Documentation System. In this example, we find out that one of them will be used in BL071 Room 027 and the other in room 121.
- Qty: In this example, there is only 1 Qty in each location so enter 1.
- Campus: Type or select BL from the drop down values.
- Building: Type or select BL071 from the drop down values.
- Room: Type or search for room 027.
- Click on the + icon to add a second location.
- Click Configure Next System.
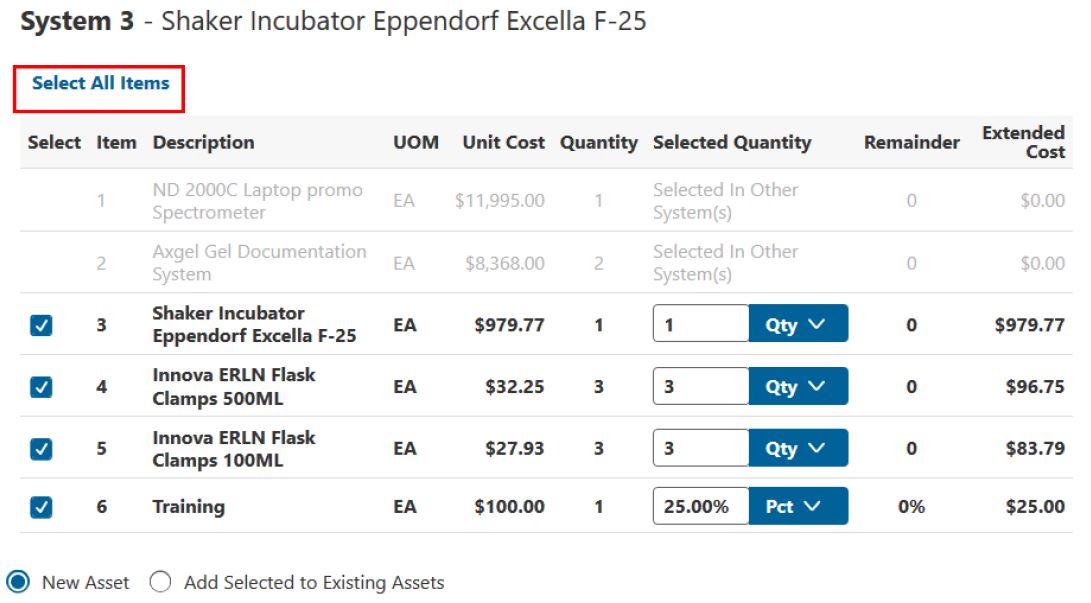
System 3 Shaker Incubator
- Since all remaining items are for the next system, click Select All Items button to select all remaining items.
- Leave the defaulted choice of New Asset.
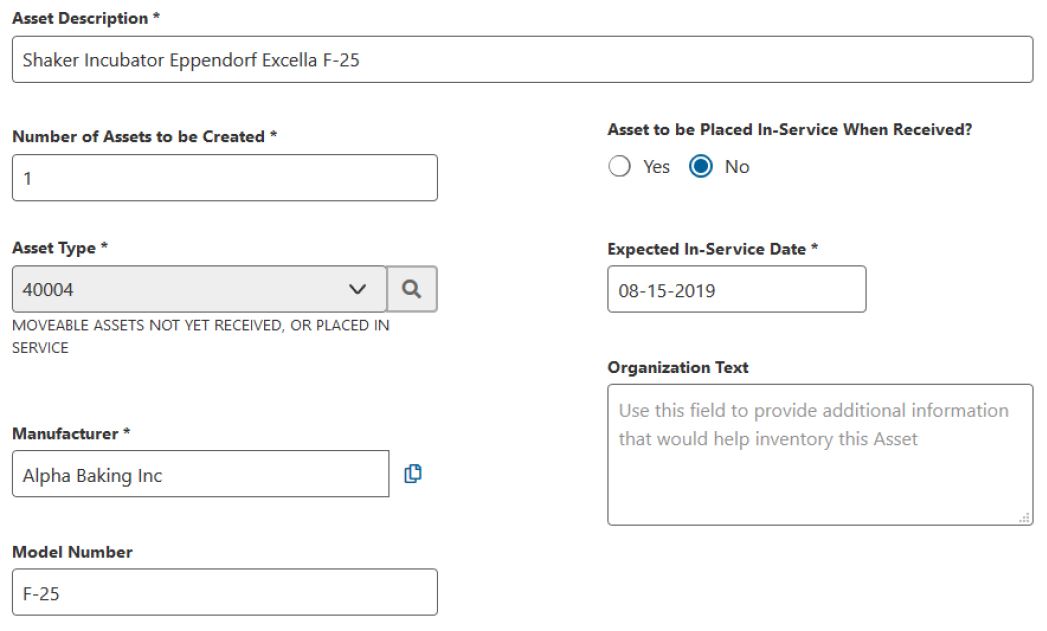
- Enter asset information for the Shaker Incubator.
- Asset Description: Leave as default in this example.
- Number of Assets to be Created: Enter 1 since this is a single asset.
- Asset to be Placed in Service Within 30 days of Receipt?: For this asset, assume the asset will not be placed in service until August 2020. Click No. Answering No requires the completion of the Expected In-Service Date field.
- Expected In-Service Date: Enter in 8/15/2019 for the date or select from the calendar.
- Asset Type: Defaulted to 40004 and cannot be changed since the asset is not expected to be placed in service within 30 days of receipt.
- Manufacturer: Click the copy icon to the right to set the manufacturer to be the same as the supplier name.
- Model Number: Enter F-25.
- Enter location information for the Shaker Incubator.
- Qty: Enter 1.
- Campus: Type or select BL from the drop down values.
- Building: Type or select BL071 from the drop down values.
- Room: Type or search for room 027.
- Now that all items have been configured, only the following action buttons are displayed. Notice the Configure Next System button is no longer available.
- Click Submit.


